Introduction


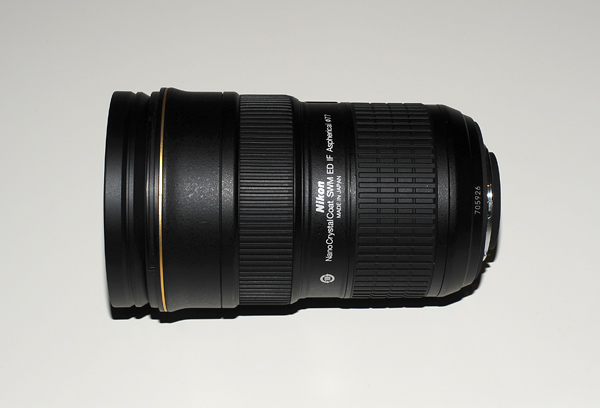
The Tamron SP AF 90mm f/2.8 Di Macro is a highly popular lens amongst amateur photographers looking forward to take themselves into the realm of macro photography. I will be showing you the results of my own tests on a Nikon D700 full-frame DSLR. This lens belongs to the SP (Super Performance) line of lenses made from Tamron, that generally have been delivering very good performance and (especially) great value for money. This lens has been replaced recently by the VC USD version which adds Vibration Compensation optical stabilization system and a silent and fast Ultra-Sonic Drive motor with the purpose of being compatible with the newest entry-level Nikon DSLRs.
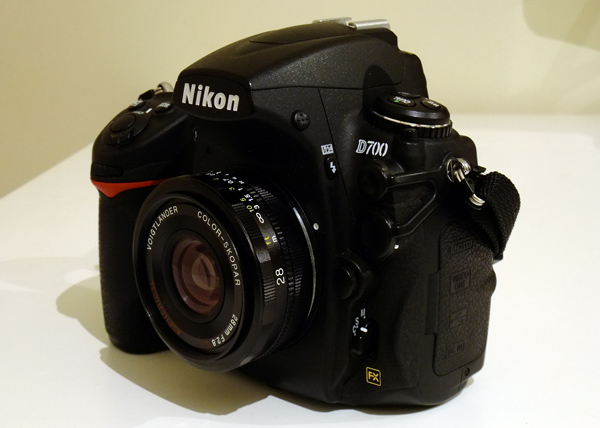
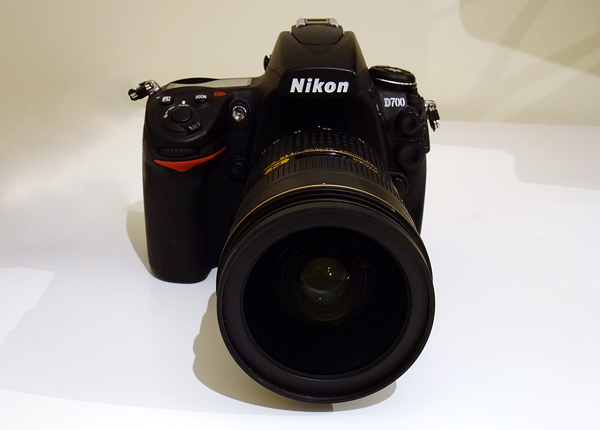
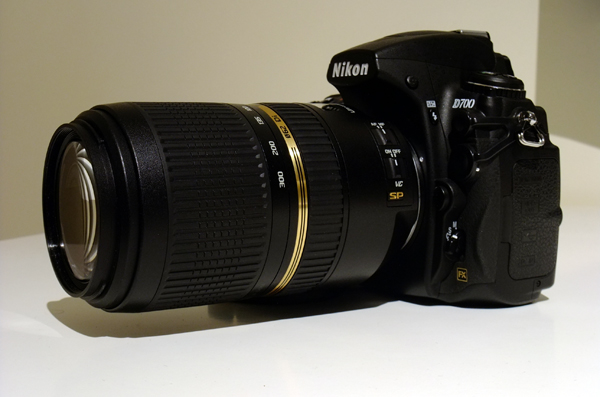
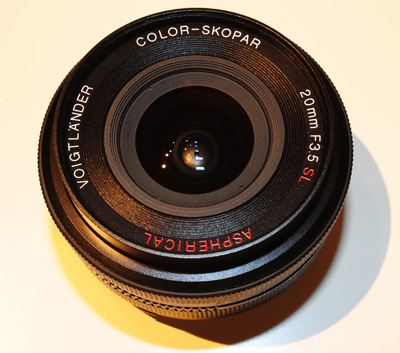
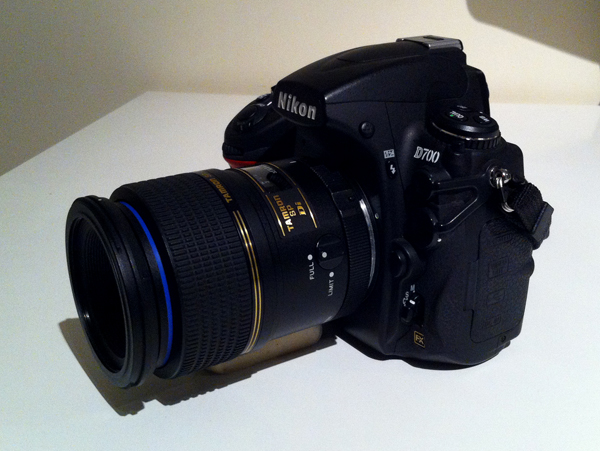
Here’s how it looks with the D700:

Announced in 2004, this particular iteration (model 272E) was optimized for digital sensors, hence the Di (Digitally Integrated) designation, and received a few cosmetical changes. Internally, this lens has 12 elements in 9 groups, none of them being of any special kind, and has 9 straight aperture blades. It doesn’t have an AF motor, so it will not focus automatically on the newest entry-level DSLRs. Speaking about focus, selecting between auto and manual is done through a push-pull clutch mechanism, which isn’t exactly friendly on the field, but mainly when it doesn’t auto-focus on the exact point at first shot and one needs to override it slightly. But when doing macro photography, most of the time it’s better to use manual focus anyway, and although the focus ring isn’t damped by any means, it is easy to turn the focus ring around since the mass of the moving elements is low. The lens is very light and compact, and with a filter thread of 55mm and weighing only about 400g, it makes a very portable lens to carry around, either on the field doing macro or on the streets shooting candids unconspicuously.
The lens is mostly plastic on the outside and has a metal mount. There’s also a rotating switch on the side that limits the minimum or maximum auto-focusing distance, depending on the current focusing point – it can either limit AF between 0.44m and infinity, or between 0.29m and 0.42m, which is nice to have to speed up the AF time. The front element doesn’t rotate while focusing, but the lens extends a lot between infinity and 0.29m, which is a bad disadvantage when shooting small insects from very close distances. In this matter the Micro-Nikkor AF-S 105mm f/2.8 G ED VR, which I also reviewed, is priceless. Like most lenses made for Nikkor until 2004, the Tamron has an aperture ring and allows to lock it at f/32 for AF, otherwise the camera would show an fEE error on the display.
Today, the Tamron can only be found on the used market, and at a price of about 250€ it’s a tremendous value for money for seriously starting getting into macro photography.
Technical Specifications
| Focal length | 90mm |
| Maximum aperture | f/2.8 (far distance) – f/5.6 (nearest) |
| Minimum aperture | f/32 (far distance) – f/64 (nearest) |
| Field of view | 27 degrees (on FX) |
| Weight | 405g |
| Dimensions | 97 x 72mm (148 x 72mm, extended) |
| Optical construction | 12 elements in 9 groups |
| Aperture blades | 9, straight |
| Filter diameter | 55mm |
| Minimum focus distance | 432mm (270mm from the front element, focus limiter on), 290mm (95mm from the front element, focus limiter off) |
| Hood | 2C9FH, round |
| Mount | Nikon F |
Mechanical Characteristics
| Zoom ring | n/a |
| Focus ring | Plastic and metal with rubber finish, no infinity stop |
| Focus throw | 260 degrees (focus limiter off) |
| Focus motor | No |
| Optical stabilizer | No |
| Front element rotation while zooming | n/a |
| Front element rotation while focusing | No |
| Internal focusing | No |
| Lens extension while focusing | Yes, up to 51mm |
| Lens extension while zooming | n/a |
| Maximum magnification | 1:1 |
Handling
With the D700, the Tamron is very lightweight and it’s easy to hold while doing street photography or portrait work. The lens is not a beauty by any means, and feels kind of cheap in use mainly due to the almost all-plastic build and the odd focus clutch mechanism. The front element is deeply recessed from the front of the lens, about 20mm, which makes it hard to reach for cleaning, and also because of this I never used the lens hood.
In macro photography and manually focusing, the lens provides a focus ring with a long throw for careful focusing, which is always nice to have, but the lens extension is so long that it can be very cumbersome when shooting insects from very close distances. This aspect of the lens is what makes it feel so cheap in use and separates it completely from the likes of the Micro-Nikkor AF-S 105mm f/2.8 G ED VR. On the other hand, there are differences concering autofocus as well: although the Tamron can’t be said to be slow focusing, it hunts a lot in low light and even under good light if the contrast is a little low. Switching the AF limit on can speed up the back-and-forth hunt but not by as much as one could expect. Another issue with the Tamron is the permanent out of focus when trying to focusing on targets at similar distances, but only at medium to high distance targets. This problem arises when I use the lens to shoot portraits or street photography at maximum aperture, whenever I do a sequence of shots on the same target, and the result is: the first shot generally is in focus, but all the next shots will be out of focus, and the only way to work around this is to stop down to f/4 at least. Mind you that the problem exists only at maximum aperture, so I’m not sure if it’s only with my copy or a known issue with this lens. Because of these observations, and not surprisingly, the Micro-Nikkor trumps the Tamron in the AF department in every way possible. It’s simply in another class of its own, as the price suggests.
In summary, handling this lens is not really very pleasant, and unfortunately it may be not the ideal tool for some areas of macro photography either.
Resolution
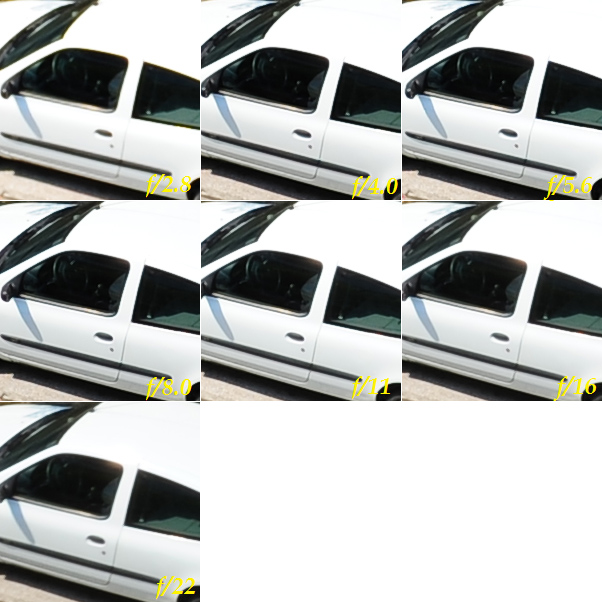
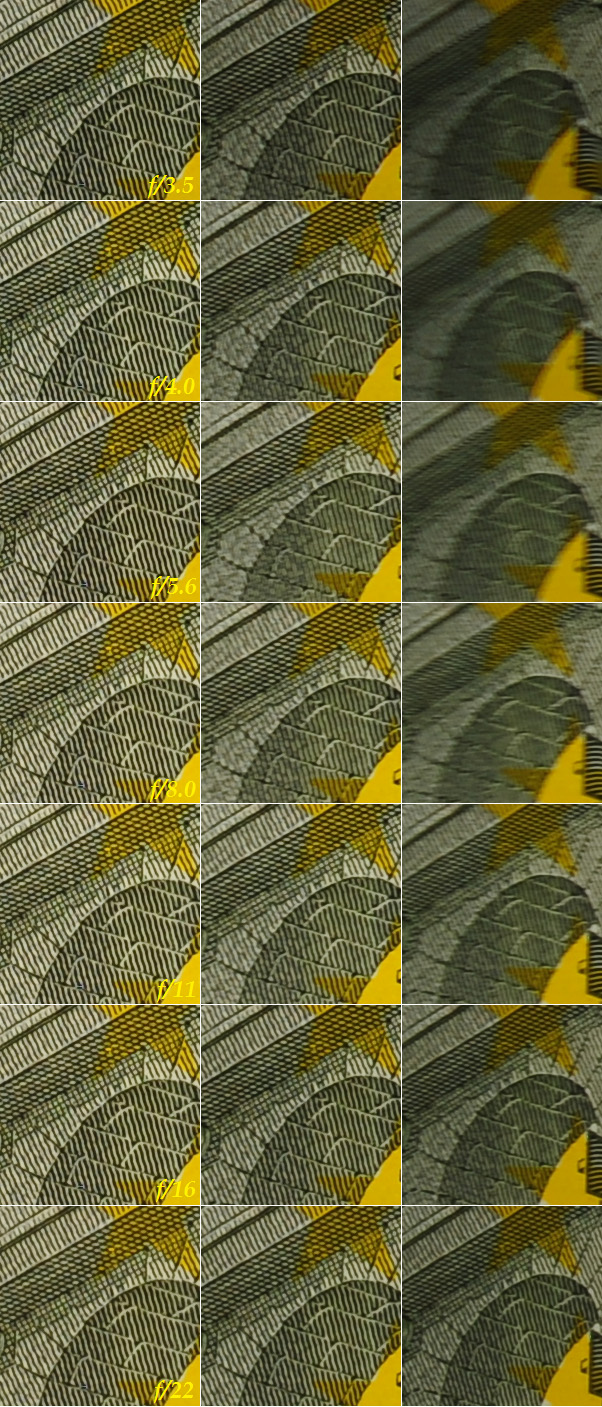
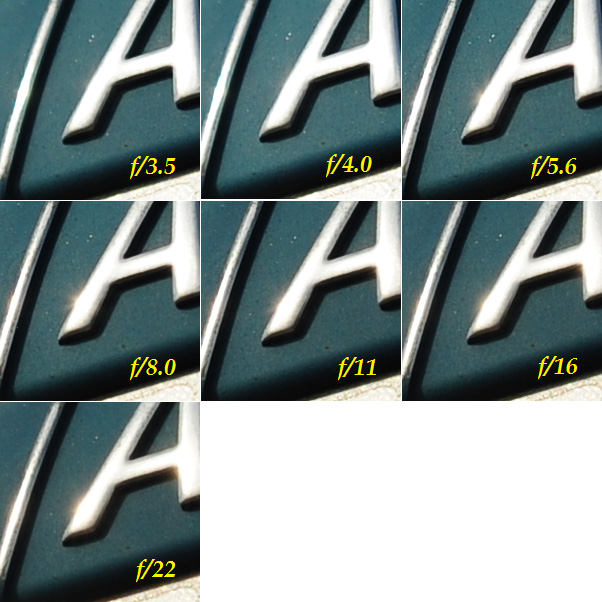
For the resolution test I shot the 5 Euro bill as usual. Focus was achieved using Live View to avoid auto-focus imprecisions and to compensate for possible field curvature issues.
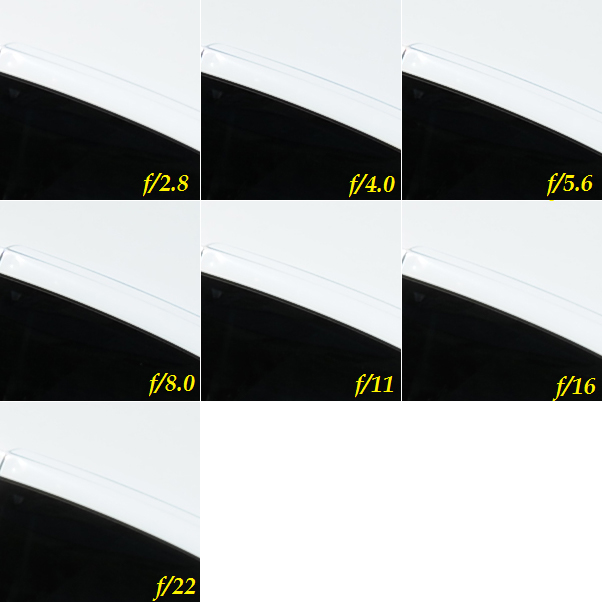
The first column shows a crop of the image center, the DX corner crop is on the second column and the third column shows a crop of the FX extreme corner. Each row represents an aperture setting, from maximum to f/22 in full stops. I opted to show crops only until f/22, since closing the aperture even more results in more and more diffraction. Also, the target was at a such distance from the camera that the maximum effective aperture was f/3.0 instead of f/2.8 – the camera always reports the effective aperture. Here are the results:

It shows the incredible amount of detail that the lens is capable to deliver in short distance department, right from the maximum aperture from corner to corner. It appears to be even a hair sharper than the 105mm VR in the FX corner, which loses a bit of “bite” there at maximum aperture.
The Tamron is a winner here, and for the price it’s fantastic! But what about long distance targets? Let’s see below:

There’s a loss of sharpness at f/2.8 in the FX corner, just like happened with the 105mm VR, and there’s also some vignetting affecting the exposure. At f/4 the problem is solved.
This indicates that the Tamron could be a superb lens for every kind of shooting, and I can only fault it when it misses focus wide open when using AF.
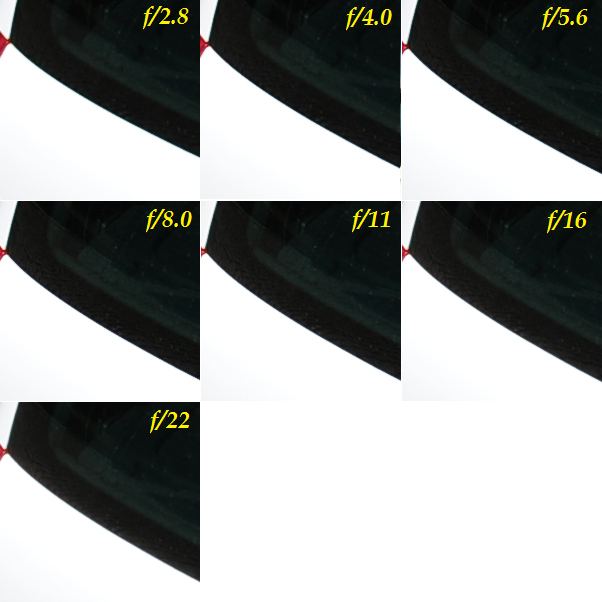
Distortion
I tested distortion with the usual brick wall shot:

Distortion is extremely low but has a wavy characteristic that it’s a little hard to describe and depict here in this image, but it’s virtually never a problem in the field and barely visible even in this kind of targets.
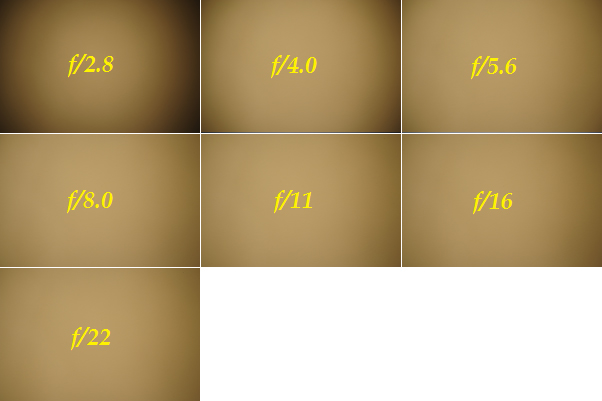
Vignetting
In this test, I shot a white wall at home using tungsten white balance and set exposure manually:

There’s a lot of vignetting at the widest aperture that affects the entire picture, but decreases substantially by stopping down. At f/5.6 it’s completely gone.
Chromatic aberrations
For this test I shot a car from above on a bright sunny day early in the afternoon:

This lens is Di (Digitally Integrated) which means it should take care of chromatic aberrations better than its antecessors, but although this test doesn’t show any vestiges, I know from experience that it shows a some wide open especially in metal surfaces under bright light. But at f/4 they’re completely gone.
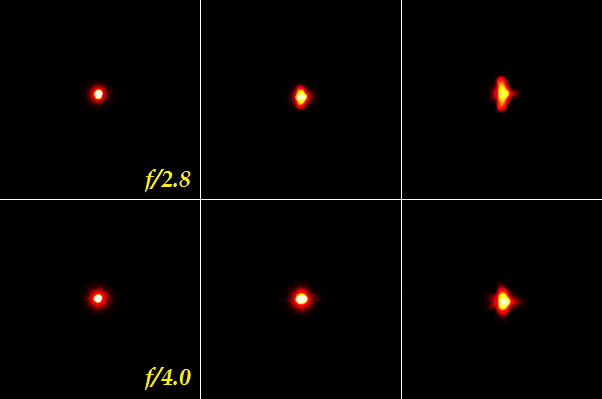
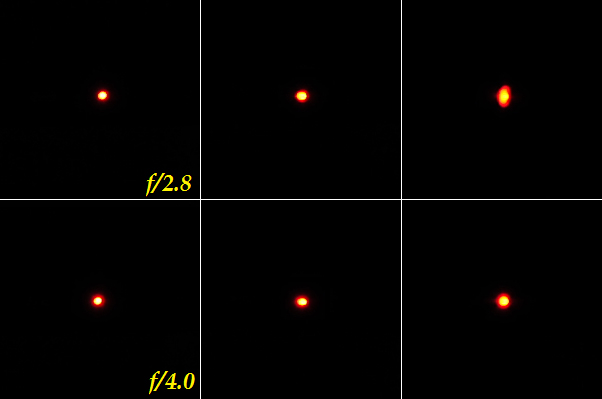
Coma
Coma was tested using a LED source, at home in a dark room. I put the light source at the center (first column), corner and extreme corner of the frame (second and third columns, respectively), at maximum aperture and stopped down.

Coma is visible at full aperture already in the DX corner in these type of test shots, but it’s rarely seen in practice. The points of light are always pretty much circular everywhere and only the small less bright areas around the center are kind of oval, but hardly distracting. By f/4 the “problem” is not visible anymore. All in all, it’s a more than good performance here.
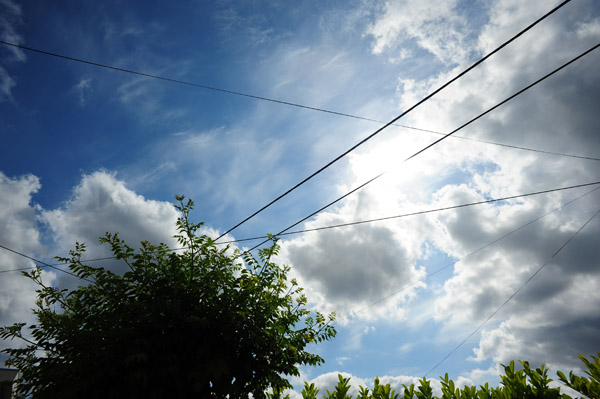
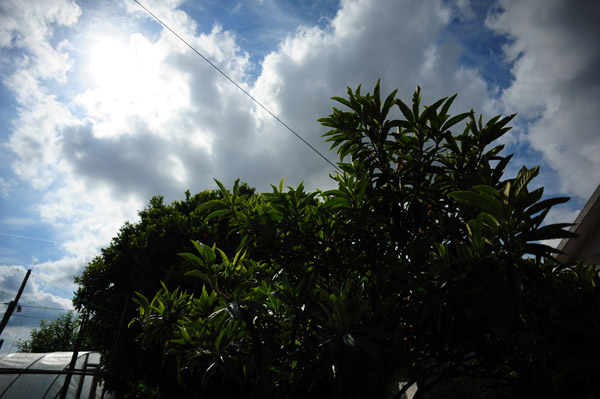
Flare
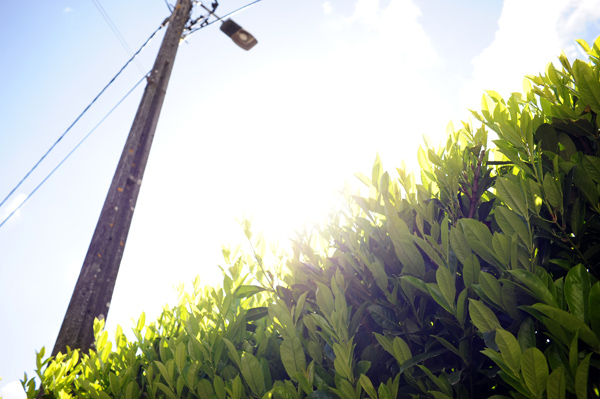
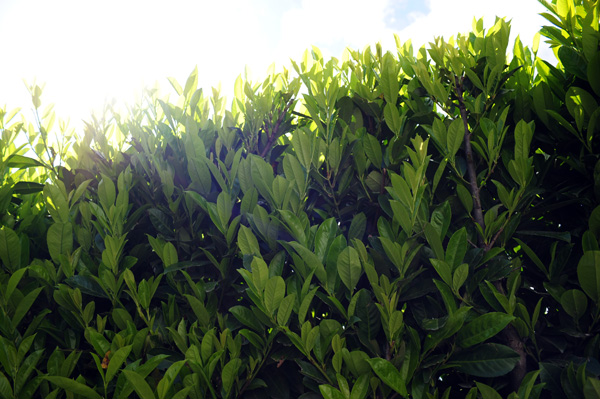
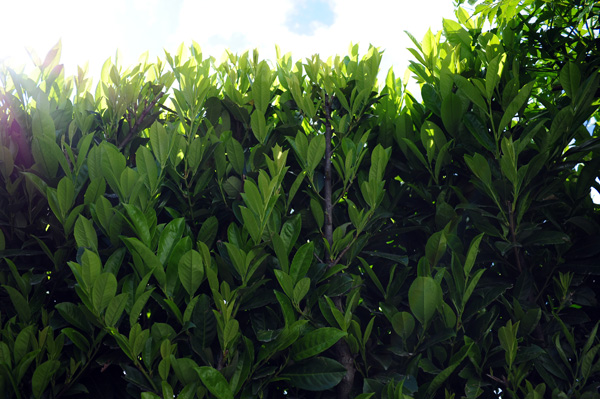
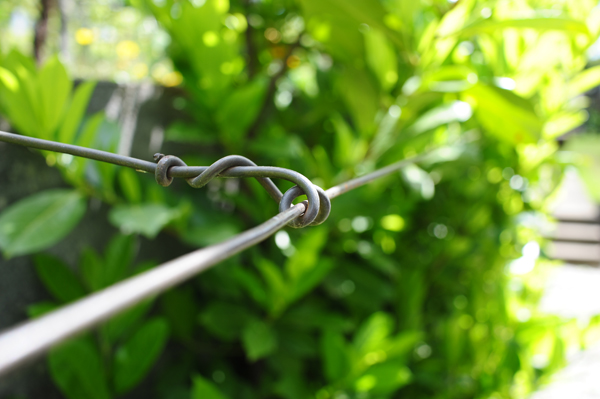
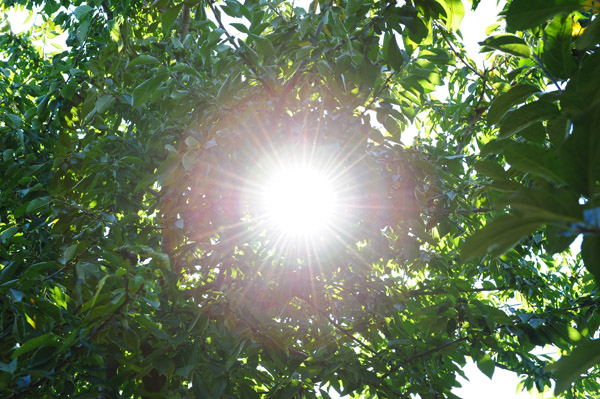
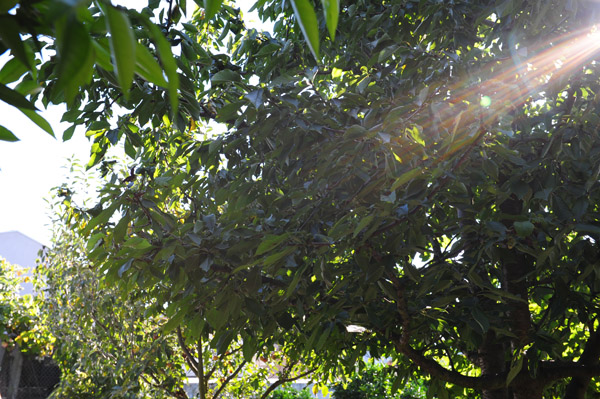
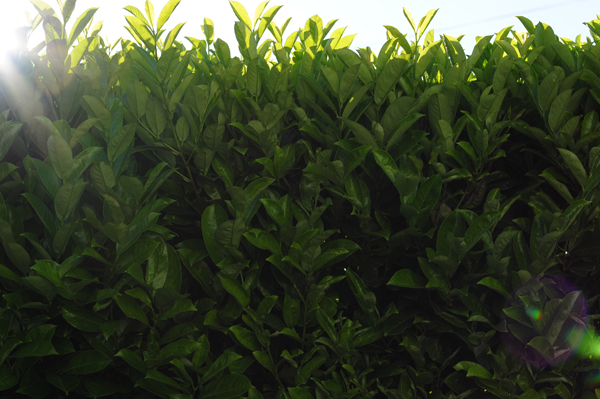
I shot some foliage in my garden against the sun, to see if I could see any flare vestiges. I shot directly against the sun, then placed the sun at one corner and finally made some shots with the sun just outside the frame.
 |
| Shot directly against the sun. |
 |
| Shot with the sun placed at one corner of the frame. |
 |
| Shot with the sun just outside the frame. |
The lack of special elements in the design of the lens also shows here in this test. Shooting against the sun doesn’t result in a real loss of contrast, but the problem is the high amount of internal reflections when the sun is placed in the corner of the frame or just outside. Of course, macro photography and sun in the frame usually don’t go together, but it’s a real problem when shooting landscapes of any things other than macro with the sun there or nearby. It’s also susceptive to flare at night with street lamps, so watch out.
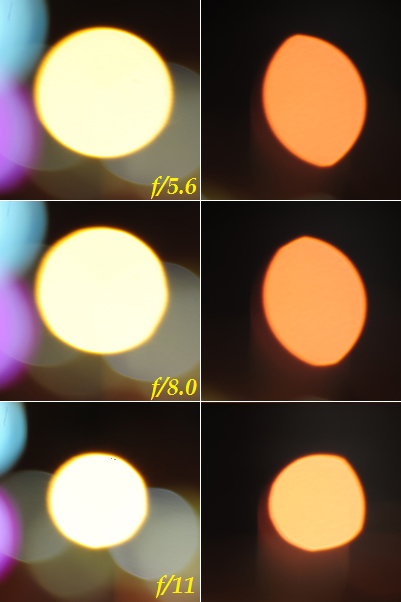
Bokeh
The lens has 9 straight aperture blades, and therefore it’s expected to see circular out of focus highlights at maximum aperture and polygonal shapes when stopping down. I took a defocused picture at the widest aperture of the city lights and got crops of the center, corner and extreme corners. The test was repeated for the subsequent two stops. Due to the focus distance I selected for this test, the maximum effective aperture was reduced to f/3.5.

As expected, bokeh at the widest aperture is generally pleasant but not as creamy as with the 105mm VR because of the visible edges. This is especially noticeable when shooting against foliage and the sun, where the multiple out of focus highlights and their edges can be a little distracting. At f/4 the difference is the begin of the polygonalization of the highlights, which are clearly seen at f/5.6.
Of course, overall it’s still pretty good.
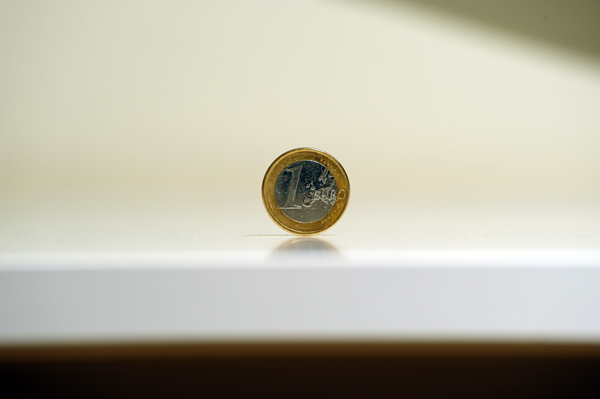
Macro/Close-up
With the focus limiter switched on, the Nikkor was capable to focus as close as 43.2 centimeters from the sensor plane, or 27 centimeters from the front element. When the focus limiter is switched off, the focus distance drops down to 29 centimeters from the sensor plane or 9.5 centimeters from the front element, to a maximum magnification ratio of a real 1:1.
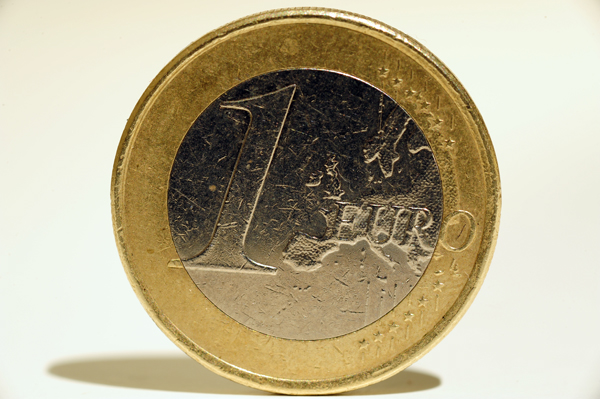
I shot an 1 Euro coin and this is what to expect at the minimum focus distance:
Focus limiter on

Focus limiter off
Summary
| Build quality | 6 | Almost entirely plastic but the build is tight |
| Handling | 4 | Lens extension while close focusing and clutch mechanism may bother some, repetitive misfocus wide open is bad |
| Resolution | 10 | Superb sharpness across the frame at all apertures, it hardly gets better than this |
| Distortion | 10 | Absent in all practical shooting |
| Vignetting | 9 | Very strong at full aperture, but improves a lot by stopping down |
| Chromatic aberrations | 8 | Easily seen in metal surfaces in bright light at maximum aperture |
| Coma | 10 | Pretty much unnoticeable in practice |
| Flare | 4 | Contrast almost doesn’t suffer but may produce harsh internal reflections |
| Bokeh | 6 | Very soft but highlight edges can be distracting at times, gets polygonal too early by stopping down |
| Overall | 78% | A good lens for getting started with macro photography, and delivers beautiful results in many other areas |
Samples
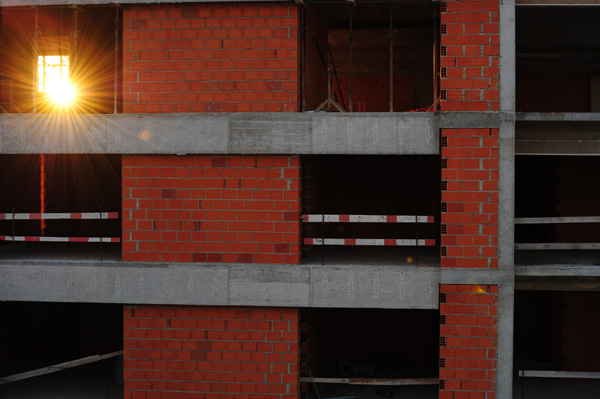
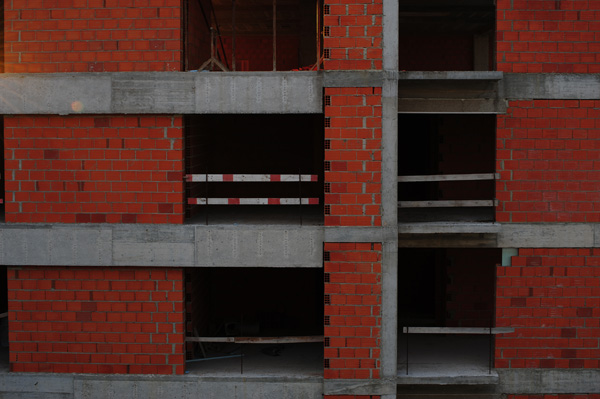
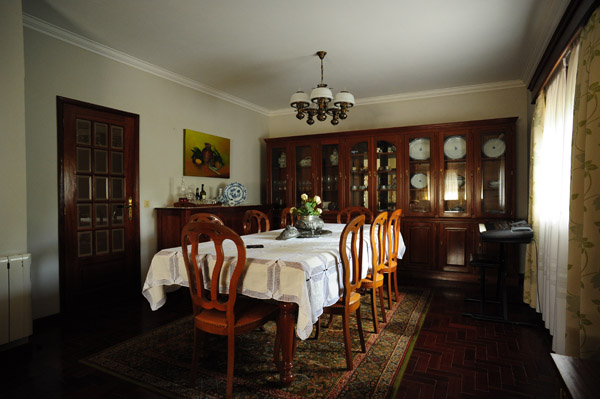
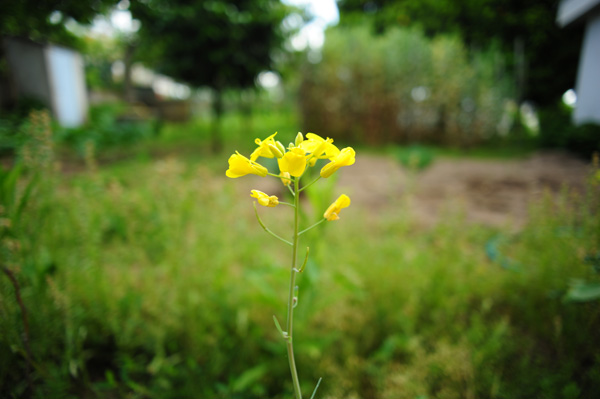
Here are some samples of pictures I made with this lens. Settings: native JPEG, picture control set to Landscape mode, no post-processing applied except reducing to 600 pixel width.
 |
 |
 |
 |
 |
 |